As we saw in this news, update 2.0 brings a lot of new features, including two new activities that will keep you busy for a while, the Macroscope and the Seeker Droid. Of course, like any guide, the following article contains révélations !

Principles
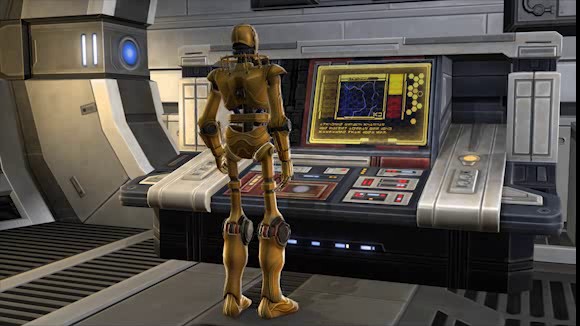
The Seeker Droid is the perfect companion for your treasure hunts. Able to detect areas likely to contain treasures, it even takes care of digging them up for you, provided you indicate the right location to look for.
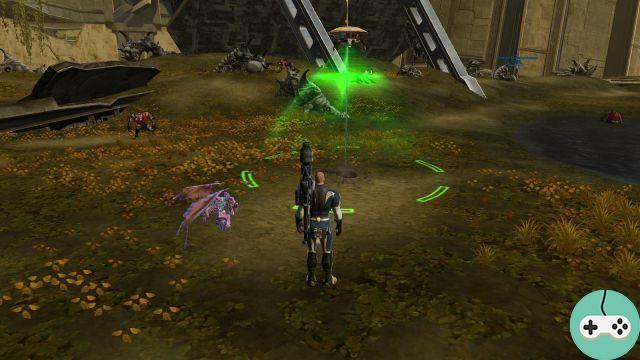
Once you've selected an area, the Seeker Droid searches the ground for valuable items, and alerts you of a positive or negative result. If its sensors indicate the presence of an object near to it, it lets you know by a message and a circle around you, indicating the probable direction. The green semicircle tells you where to look.

In order to best determine the direction to take, it is a good idea to scan the same spot twice, which gives you two different directions. Then you just have to go in the direction common to both results. A diagram is better than a long speech (thanks to Dabager for the inspiration of the diagram):

Quests: part 1
To start the questline, go to the Republic Fleet and talk to the little droid (minimum level 52). It puts you in touch with the Master Cedral Grend. The Master warns you that a terrible threat (one more) is taking shape all over the galaxy. The Dread Masters sacked an Emperor's warehouse and unearthed powerful Sith artifacts, Seeds of Rage, which they sowed all over the place. We will therefore have to find these Rage Seeds, and this thanks to the Seeker Droid.
And since you have to start somewhere, the Master sends you to four heavenly destinations:
Taris

Go to the nearest taxi first and select the Draay waypoint station.

You will see the marker on the map right in the middle of a Heroic Zone.

You will have to look for the Seed in the indicated area while being careful of the rakghouls present, and especially a rather tough Champion rakghoul.
Tatooine

The desert is a great place to dig, apart from sunstroke, Sand Men and that filth of pillaging Jawas. Let's go to the Thorazan outpost.

Get out here:

You will find yourself this time again in a heroic zone. Search all over the indicated area, following the information from the Seeker Droid, and it shouldn't take long to find that second seed.
As on Taris, watch out for a big, ugly creature:

Corellia
We now shift towards Corellia, which is also home to its own area corrupted by the Seeds of Rage. Direction the Metro North of the Axis Park.

Once there, meet at Coronet Zoo.


While doing your research, beware of the evil beast patrolling the area. Believe me, if you're alone, will you regret it if you ever tickle her a little too closely?


Hoth
The last step (in any case of this first part) leads us to Hoth. Plan the fleeces, there is a risk of peeling the miquettes. Take the Senth outpost speeder.


Go to the indicated area.

You will find not very bad cryo-trackers, on the other hand there too, beware of a Champion:

Once the last Seed of Rage is found, Master Gend sends you your reward:

First part finished.
Quests: part 2
Once all four Seeds of Rage are in your possession, Master Gend informs you that the Dread Masters have launched an attack on the Arcanum, a warehouse used by the Sith to store their artifacts.

Go to the imperial zone to land on the Arcanum space station.

You find yourself in a devastated shed, with corpses littering the floor.

Take the elevator, and get off at the Specimen Storage Complex (that doesn't smell good at all). Here you are in a gigantic warehouse, with dozens of droids burning the corpses of bizarre critters.

Get out of the way, and a little advice, don't kill the robots right away trying to burn the cute terentatek, wait a minute? Continue to clear the path, being careful of the holes in the ground that you don't necessarily see right away (yes, yes, I speak knowingly)

Continue your journey, you will find the Sith seen previously busy excavating. He will unfortunately not give you time to get his hands on him, and will flee with a relic.


Follow Lord Tagriss, and there you will find the very first Rakghoul there.


Then take the same path as the beast, then after the attack of a few rakghouls, jump on the crates and follow the arrow.

Go up to the top and continue the path, and a little more climbing awaits you. You arrive in front of Lord Tagriss, who flees yet again, leaving you to grapple with his minions, plus a few Shredders.

Take the elevator to the biological isolation room, and take the light path. A sign tells you what to expect in the next room. (It smells really bad.)

Tagriss is already there, and frees the ugly villain, whom he will have to face.

Once the villain is defeated, Master Gend informs you that the last enemy forces are defeated, but that the Imperial Fleet is heading towards your position. It is high time to go. Without forgetting the reward of course.

Quests: part 3
Master Gend also informs you that new leads have been found regarding the Seeds of Rage. We will still have to visit the country
Alderaan
Go to Alderande, and go to the indicated area, via the taxi from the Maison Alde library.

On the spot, beware of really nasty critters. I've seen at least three Champions, watch out for your back?


Balmorra
Take the taxi to the Sundari outpost, and head north:

Once there, you can once again contemplate the corruption of the Seeds of Rage. Beware of the corrupt Republic Soldier patrols that haunt the area.

You may also be surprised, like me, to see your researcher droid unearth ... a buried monster:

With the seed in your hands, it's time to clear this spot and take a ride on Voss.
Voss
Time to visit these bizarre .... very nice Voss. We will have to go, in fact not very far from the starting point, but we will have to go around, passing by the skyhopper of the Talanis camp.

Enter the cave and come out further, you land once again in a not really nice place, with lots of bugs everywhere, including one at the back, which personally does not seem very friendly to me.

But hey, whatever, we will have to go down to find this Seed.

Once recovered, Master Gend announces that his spy has found the place where the Dread Masters thieves are hiding, and sends you your reward.

The adventure now continues on Belsavis.
Belsavis
Once on Belsavis, we will have to flush out the thieves in their den. Take the taxi to the operational center, then the teleporter in the same place to get to the Energy center of the Republic.

When exiting the teleporter, head north to the exit, then follow the quest marker


Here you are in front of the thieves' bunker. Hey, the door looks weird ... ah bah isn't it a door?

Enter and take the teleporter to the Dread Guard Sanctuary. Progress in the corridors, you will quickly face the Dreadguard Varrow.

To defeat him, there will be no point in hitting him. He is immune to all damage thanks to the Staff of Darkness, stolen from the Arcanum station. It will take down the monsters it summons to weaken it. After three summons, the evil Varrow collapses.


Continue the progression, until you find a new Dread Guard, Avarok.

Okay, don't worry, no fuss, we can beat! Once the ugly villain is on the ground, activate the holoterminal at the back of the room.

You learn that Tagriss is hiding on Ilum, in an old corrupted Jedi temple. Come on, hop, we know our next destination.
Ilum - H4 Until the last seed
So here you are at the last leg of the journey. Lord Tagriss is hiding on Ilum, in an old Jedi temple, and he's going to have to go find him. First of all, you will have to compose your group. Rather, a group of four players is recommended. We can easily do without a tank, in any case, we did without, rather easily. Once your group is ready, go to Ilum.

The Jedi temple is well hidden at first glance, you have to go into a small hollow, to the left of the stairs.

To the left of the entrance, you will see a droid on the ground, which can be used to repair.

Once entered, clear the premises of corrupt soldiers, then take the elevator.

Continue, then you will arrive in a room, with an elite at the end, and eight magnetic fields blocking access on either side. To be able to pass, we will have to organize ourselves a bit.
In this room you will see several things. Next to each magnetic field, a generator. In the middle, a larger generator powering turrets. And on both sides, rechargers of energy cells.


The goal will be to charge the generator of the turrets, while preventing the magnetic fields, attacked by corrupt soldiers, from falling and you being overwhelmed. It will therefore be necessary to use the cell reloaders in order to charge the turret generator, in all 6 times, by charging the magnetic fields as soon as they weaken (they turn orange, then red.)

The technique that worked quite well is that each DPS takes care of a cell loader, and the tank and the heal remain in the middle to take care of any mob pops. The role of the DPS will be to charge the turret generator by taking a cell in the charger and placing it in this generator. As soon as a magnetic field turns red, it must be recharged too. It is better to go as quickly as possible to charge the generator, its turrets then dealing with the mobs.
Once the generator is loaded, the turrets take over, and the back door explodes, leaving the passage free.

Bonus: Seed Science
A bonus quest awaits you in the Jedi Temple. It is enough to recover four registers of Lord Tagriss.
1) In the first room on the left

2) On a table, in the room just before the generator room

3) In a small corner, to the right in the generator room

4) On an altar, shortly after the first boss

Once you've passed the room, it's time to face a serious foe, the Corrupted Experimental Novo-Sith.

The technique is quite simple, but not necessarily easy to find immediately. First, you will find barrels on the ground, wrapped in tentacles. Free them.

Once this is done, deal with the Novo-Sith, which disappears shortly thereafter to leave you with tentacles. Zigouille them, then the boss reappears in a jump. Only, he is almost invulnerable. In order to make it vulnerable, you have to detonate the barrels. But of course, they're too tough. The technique is therefore to place all on a barrel, well above, when the last tentacle dies. Thus, the boss will jump on one of you, and with his momentum, will explode the barrel, making him vulnerable to your blows.


It will also be necessary to be vigilant with its fate "Triple frenzied tongue", which makes it restore its health. It will therefore have to be interrupted as quickly as possible.

With all this, no doubt this Novo-Sith will not last long.

Once the boss is down, continue your way, being careful in the next room with two patrols on each side. You then arrive in front of the room of the big bad, Lord Tagriss, who is obviously very busy.


No courtesies, which hold, go let's go for the castagne. In the room you will see three crystals, colored green, blue and orange. These crystals will be very important for the future.
The boss will enter several phases, each one being modeled on the same diagram.
Start by typing the bad guy, who after a while, will immobilize you and launch lightning bolts towards the green crystal. At this point, one of the DPS will have to click on the rest of the crystal, which will cause the Seeker Droid to appear, and provide him with a crystal shard, allowing him to then click on the Forge at the back. , in order to deactivate the seed. Rebelote, we retype, he re-breaks a crystal, etc ...


Once in the second phase, just after launching the lightning on the blue crystal, be careful because it will launch lightning on the water. It is therefore better to take refuge on the steel grids, on the Forge or outright on the blue crystal to be able to recover it then quietly.
Once these three phases have passed, you just have to type it quietly, and it will disappear at 25% of its life. Once this is done, you can either click on the altar (Dark Choice) or simply go from there.
Then, return to Coruscant to see Master Gend and receive your reward.

During the end cutscene, you'll have a choice to make. Either keep the Seed to yourself or do nothing. The choice you make conditions the armor that you will then receive as a reward, then the parts that you can later recover with the Seeker Droid. The dark choice will grant you the Dread Seed armor, as well as the title "Dread Seed".

(I'm looking for the screens for the bright choice :))
I would like to say a big thank you to En'kila, Vaard et Boïndil who accompanied me in this quest and who were very good traveling companions. Thank you so much.

End of the Seeker Droid guide. We meet very quickly for a guide on the objects to find with.


