Again Mothership from the Illendar guide, for Denova's sequel in Hard mode. Tighten the buttocks ladies and gentlemen because here you are in front of the last boss of the Denova HM instance and everyone will really be involved. If I wanted to reassure you a little bit, I will say that the very good groups of players fell this boss a long time ago and that without the upgraded Black Hole gear (or even Rakata with augmentations) like most of you. must be equipped. If you are there it is because you have this type of equipment, so Kephess is largely within your reach, again focus and concentration are the main assets as this fight is long and requires the reactivity of each one.
Do not worry if it seems a bit messy, on the one hand because I am writing to you by the pool on our terrace in Spain (bisquez !!!) so the phases seem a little distant to me but it should be fine and d 'on the other hand well… this fight is very long with a succession of mini bosses which will rot your life.
List of mini bosses and map of the area
So if I recapitulate all the opponents that you are going to have to face in order:
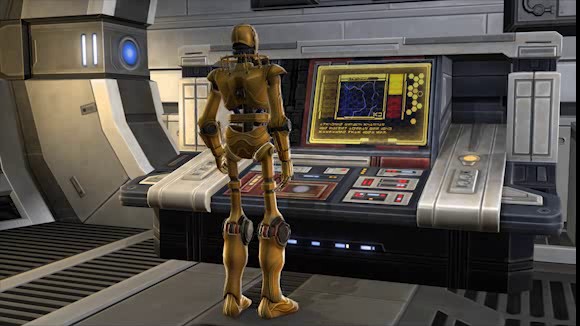
- 3 shabby droids to warm up (in yellow below)
- Bombers / bombermen that appear on the blue rectangles
- The walker in which Kephess is hiding (the red triangle)
- 3 groups of trandoshans (purple areas)
- Two twin droids (green cylinders)
- Kephess who hits very very hard who at the start of the fight will be placed in the Walker
The open-air enclosure looks like below, I now place all the opponents to avoid repeating my many shabby designs ...
Kephess placement" src="/images/posts/b4a18962b410712864ac9464eb639638-1.jpg">
Combat and focus workings, boss after boss
A little aside on the Walker
Instead of respecting the chronology of appearance of the opponents, I will do a little aside on the Walker who, almost throughout the fight (at least until his death), will perform a circular shot and this repeatedly on the combat zone. These areas are small (thankfully) and do significant damage, so be careful. Here is the Walker's firing order:
- The zone violet trandoshan n ° 1
- Twin droid (cylinder) # 1
- The beginning of fight droid (pentacle) # 1
- Twin droid (cylinder) # 2
- The zone violet trandoshan n ° 3
- Twin droid (cylinder) # 2
- The beginning of fight droid (pentacle) # 1
- And many more
It is obviously a fairly large firing zone, as the fight progresses certain zones could overlap with a mini boss to kill which sometimes complicates the fight. Pay attention to where he just fired to avoid ending up with the group in his fire zone.
I will add in addition that it performs 3 or 4 bursts on the members of the group and this randomly, the strength shield of a scholar or a quick heal on the targeted player can avoid a significant loss of life. These shots occur with every AOE shot
The 3 droids
These droids are pretty straightforward to kill, I think they are there to give the party indication and operation of the walker's firing zones. Because although not very dangerous, if you find yourself under the zone of fire… ouch, it starts badly for your healers. To avoid these shots we proceed as follows:
- Tank n ° 1 + DPS group + 1 Heal take care of droid n ° 1
- Tank n ° 2 + 1 Heal taunt the right 2 and 3 and engage the right n ° 2
- Once the first droid is finished, the party attacks droid # 2.
- Once the second droid is finished, the party tackles droid # 3.
Normally the Walker's firing area will be in the center so you won't get hit when you drop the last droid.
Some spells are cast by the droids, break them, it doesn't eat bread, although the real effects of these spells and their possible damage are unknown to me.
The Bombermen / Bombers
Once the droids are finished, a bomberman will appear on one of the blue areas of the map and this randomly. My advice is to make the best use of the grappling hook ability of a shadow or vanguard to bring the bomberman closer to the group for two reasons:
- Gain DPS (less movement = more DPS)
- Avoid a walker firing area by moving the bomberman
As a reminder, three possible locations:
- The beginning (the entrance)
- In front of the entrance (which we call "Opposite" but you can call it backhoe loader or hydrometric pressure I don't care)
- To the left of the entrance along the enclosure, which we call "left" but in some groups it does not work (some confuse the left with the other left J)
We manage in two ways the appearance of the bomberman and this throughout the fight according to the shots of the Walker:
- The group is placed between the entrance and in front, the player with the grappling hook just takes care of the possible pop of the bomber on the left
- The group moves to the left bomber, the player with the grappling hook takes care of the other two pop areas
As soon as the bomber pops, you will have a large dps to provide but also a large heal, because the latter sends a fairly large salvo on 1 of the members of the group (which, if it is combined with a salvo from the walker, can cause the immediate death of the targeted player). I'm guessing the first player to shoot / jump or apply damage is often targeted, so let your available tank jump first. If it's too slow, let your heals take care of the hit player's health bar.
Once the bomberman is killed, one of the party members will have an explosion icon above their head. He will have to place himself quickly under the Walker to deposit explosives. Don't hang around because the time lost here will impact the duration of your DPS on the walker.
If you failed to kill the bomberman, you are already in the m ... e for Kephess' rage, avoid this kind of joke and give it a go.

Le Walker
For information, being under the walker causes "substantial" damage, you will have several options when the player goes to place the bomb:
- Let him die (bad plan)
- Treat him (interesting option)
- Using a scholar / wizard's grappling hook (everyone's favorite)
Once the player is under the Walker, an animation will start (what Luke does in the Empire Strikes Back when fighting over hoth with an AT-AT Walker), at which point you can already use your grappling hook to get the player out of the AOE, this does not interrupt the bombing.
The Walker will then collapse and you will have to let go of the sauce by inflicting as much damage on it as possible. As I told you earlier, with a group equipped with augmented rakata and / or augmented black hole, this is no longer too much of a problem. Trying to hit 55% is a very good thing, being above 70% is worrying. Do not hesitate to use a kikimeter (mox parser or a web log analyzer (to be preferred I think) and see in your group which has a bad cycle in order to help it improve: spell rotation, equipment, modifications , increases etc. It is also the moment for one of your sentries to cast his spell "inspiration" which will allow the group of DPS to avoin a little more.
Pop des trandoshan
Although the first group of trandoshans have already spawned, just keep hitting the Walker while you can. It is enough for one of your tanks to launch an area taunt and to remove the lizards of the group. Be careful, they hit hard (it must be said that they are a lot), so watch the life of the tank in question. Once the Walker is up, it's time for everyone to get started.
The Hostile Party is made up of a Warrior (who is taller than the others) and around ten normal Trandoshans. The warrior has a shield preventing you from using zone fire, your objective if you accept it is to quickly knock out the warrior and then drop the horses on the rest of the troop.
The first group finished or not that a second group will make its appearance (purple zone n ° 2), same trash, same tactic, kill the warrior and stay well grouped so that the AOE are really effective on the rest of the trandoshans.
Finally in the purple zone n ° 3, the last group, same style, same punishment, the warrior then the rest of the group.
The real complexity here is dealing with Walker's shots and mastering your AOEs while the shield is active. Our team proceeds as follows: kill the first and the second group on the first pop area. Once the Walker's fire is over in the middle of the area, we move there, the few remaining trandoshans will be killed there. The group awaits the 3rd pop, safe from the shots of the Walker.
Transition: Once the 3rd group is killed, a bomberman will appear, seen the last zone of fire of the Walker (probably towards the starting zone or in front) let your vanguard or shadow take care of bringing the bomber closer to the group if it appears in these two areas.
The group will be ready to beat him up if he appears on the left. Once the bomberman is killed, place the bomb under the Walker and hit as hard as you can, you should hit 10 - 30% preferably. Be careful killing it in two phases can be problematic (the appearance of Kephess and a mini boss below seems difficult to manage from my point of view).
Twin droids (green cylinders)
Unlike the trandoshans, as soon as the droids land, your party must stick under droid # 1. I will advise remote DPS to spot the landing zone to shoot the Walker from there, so they won't have to move and can DPS the Walker for as long as possible.
The almost only rule here for droids is: We stick under the droid. When I say below, it's not 5 meters from the boss, really below his zone to avoid 2 shots at 10-15k each…
One of the two droids will be inactive each time, a 15-second countdown is started and visible if selected, indicating when to move. At the top, the group moves under the droid which passes active.
Only the tanks can at the limit stay a little behind history that nobody else takes the shots but if the group is reactive no need (which I wish you).
Not much to say about them, nothing to break, just a ballet between the two droids ...
Transition: Once these two droids are dead, you will have:
A bomberman to kill, nothing more to say than previously (grappling hook / group placement) and finish it off with this Walker.
Small significant addition, Kephess comes out of his hiding place and begins to hit you, a Tank will therefore have to take care of it now ...

Kephess
While your group will hit a bomberman to put an end to this Walker AT-AT, one of your tanks (and at least one heal or both) will have to take care of Kephess to prevent him from slicing through the fat. your friends because you will realize it, Kephess hits hard ... very hard.
Phase 1: 100% - 58% health
First of all, avoid lugging him in the middle of the raid, the latter does area damage in front of him, so the group should not move too stupidly and the tank if he wants to make him run should not bring him to the middle of his playmates. The DPS CAC will therefore have to be placed in the back of Kephess to hit him.
It flies several times, a red zone will then indicate its landing zone. When it lands, damage is obviously applied to players in the area but not only… understand that you have to really get away from it and not just stay 2/3 meters away. Double the distance of the beam to be truly protected.
During this period, our tanks exchange aggro to avoid taking too much money and wasting all their defensive cooldowns (CD) because obviously they will need it at the end of the fight.
By questioning our two tanks, Stardragon and Bulbiz, it turns out that a dowry is thrown by Kephess causing damage during the next hit that is a little too high for the healers' taste, look closely at your bar because it is to avoid the hit next that you will have to make a switch. It is not "obligatory" but during the last phase, you will be very happy to have your CDs available, trust me ...
We also take the opportunity to place Kephess between the “Left” area and the “Entrance” in anticipation of phase two. To get your bearings, use the boxes that are stored as a visual element, I represented them by 3 black squares on the map a little higher. If you don't move it around in any way, you will give your DPS a 5 meter margin to prevent them from getting out of range during combat.
When his life gauge reaches 58%, he casts a spell that you may have seen on Denova in normal mode: the breath of the masters. It is a huge bluish area causing significant damage to all players in the area.
What surprise here, is that Kephess uses a grapple to train you in the center of the area…. There are 3 methods that I know to get away with clothing and take as little damage as possible:
- The smart method: place your remote DPS on the left ramp which borders the entrance to the zone, once the 60% mark has been passed, they hide behind this same ramp, Kephess' grappling hook will then be ineffective on them.
- The nag method: you have CDs, heals with a decent AOE, once attracted to the center of the area, the group does not move and continues to type. Your smuggler launches their protective zone, each one throws these CDs, and your heals drop all they can to keep the group alive.
- The Rabbit Method: You have a Sentry to cast Transcendence at this point, allowing all players to quickly move out of the area and take "modest" damage.
We combine the clever method with the rabbit, history that the DPS CAC can quickly depart from the area and that the distant DPS are protected.
Note: for the smart method, if your heals are hiding ... your tank may die before or during the masters' breath, don't hesitate to let yourself be grappled to keep the group alive.
Phase 2: 58% - 0% health
Kephess will now get angry (he is surrounded by a black / purple halo before casting his spells) and will throw on the tank with the boss's aggro again the gift of the masters. At this point, a switch between your tanks must be made because if Kephess hits the player hit by the masters gift, it is instant death even on CD.
Once the boss has been exchanged, the player who has been touched by the masters' gift will drop 5 bluish zones on the combat area (against 4 in normal I believe), zones on which no player should set foot. In order to anticipate future switches, they will have to be placed intelligently by arranging them a bit like the Olympic rings and preferably in a corner of the area.
Once the fourth zone is placed, you have to get closer to Kephess again to be able to provoke him (taunt) once the gift from the masters has been thrown on tank n ° 2. Why get closer? Well like everything goes, a maximum range exists… if you are too far your buddy will most certainly die
So, that gives us:
- Tank 1 has aggressiveness
- Kephess incites the gift of the masters just after having bumped Tank 1
- Tank 2 provokes Kephess right after the bump and recovers aggression
- Tank 1 places the 4 blue areas on the left of the map and gets closer to Kephess
- Tank 2 gets bumped by Kephess and receives the masters gift
- Tank 1 provokes Kephess right after the bump and recovers aggression
- Tank 2 places the 4 zones at the bottom of the zone then approaches Kephess
- Kephess incites the gift of the masters just after having bumped Tank 1
- And many more
During these phases:
- The heals will sweat ... because the care to be provided is continuous and to be dispensed en masse
- The tanks will sweat ... because missing a taunt causes the death of your partner
- The DPS will have to shoot hard and sustainably, nothing new for you slackers ...
The essential tools of combat
There are many, but if I had a short list to give:
- Excellent communication between tanks for the last phase
- A good placement of the group through the different bosses, especially for the shots of the Walker AT-AT
- Good responsiveness from everyone regarding the sequence of sequences
- A very good DPS to provide on the Bombermens and on the Walker
That's it you have finally "Clean" the HL content of SWTOR 1.3, all you have to do is confirm your performance by completing the operation each week to:
- Equip players in your raid
- Collect synthetic energy matrices and molecular stabilizers from the 3 chests littering the instance (for crafting or for resale)
- Continue to collect black hole marks to extract the best modifications and sophistication for your class and specialization but also for your rerolls (https://gamesmanagers.com/96937-swtor-optimiser-son-stuff-grace-a-lheritage/ )
- Obtain armor index 61 (rank 26 = campaign) to learn the plants, the resale and especially to improve your equipment (armbands - belt)
Good continuation to all!


